The Pen tool creates precise
curved and straight-line segments connected by anchor points. If you click with
the Pen tool, you will create corner points and straight-line segments with no
direction lines. If you drag with the Pen tool, you will create smooth curve
points and curve segments with direction lines. The distance and direction in
which you drag the mouse determines the shape of the curve segment.
The Pen tool is the most
difficult tool in Illustrator to master. Patience and practice are required to
become comfortable and adept using it.
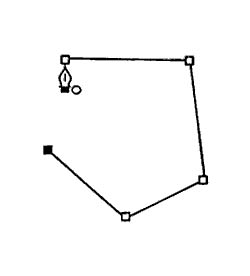
Creating a straight sided object:
Choose the Pen tool.
Click in the work area to create an anchor point.
Click to create a second anchor point. A straight-line segment will connect the two points.
Click to create additional anchor points. They will also be connected by straight-line segments.
To complete the shape as an open path:
To complete the shape as a closed path, position the Pen pointer over the starting point (a small circle will appear next to the pointer), and then click.
If you use the pen tool when
your illustration is in Preview view and a fill color is selected on the Paint
Style palette, the Pen path will be filled as soon as three points are created.
To create segments that appear as lines only, choose a Fill of None and choose a
stroke color before using the Pen tool.
Hold down shift while clicking with the Pen tool to hold your line to the nearest 45-degree increment.
Creating continuous curves:
|
 |
|
 |
|
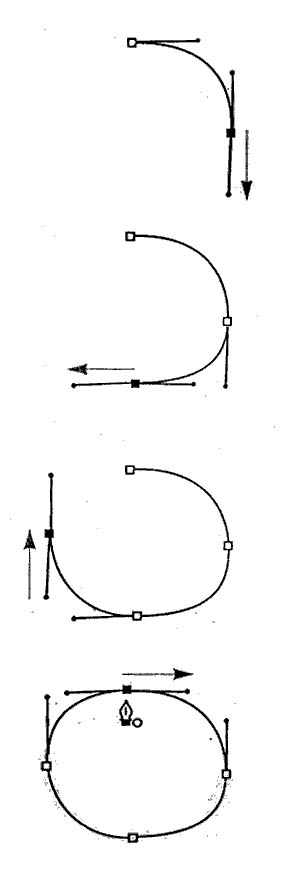 |
The fewer the anchor points,
the smoother the curve, too many anchor points will produce bumpy curves.
If the last anchor point was a
curve point and you want to convert it into a corner point, click on it with the
Pen tool, and continue to draw. One direction line will disappear. If the last
created anchor point was a corner point and you want to convert it to a curve
point, position the Pen tool pointer over that last anchor point, then press and
drag. A direction line will appear.
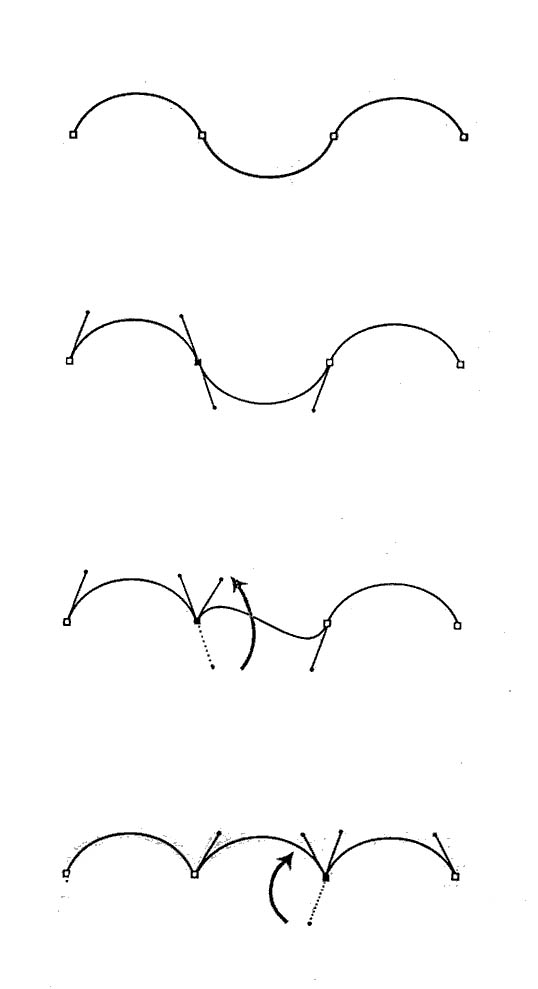
You can use the Pen tool to
create non-continuous curves (segments that curve on only one side of the anchor
point, like a series of archways). The anchor point that connects non-continuous
curves is called a corner point. If you move one direction line from a corner
point, only the curve on the same side of the point will reshape. Continuous and
non-continuous curves can be combined in the same path.
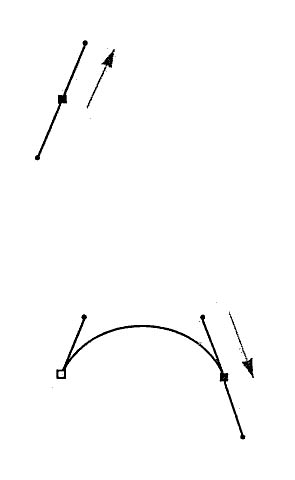
Two methods for producing
non-continuous curves follow. In the first set of instructions, you will press
and drag to create an anchor point first, and then hold down Alt (Option/Mac) to
redraw the direction line for that anchor point.
|
To create
non-continuous curves (Pen tool method):
|
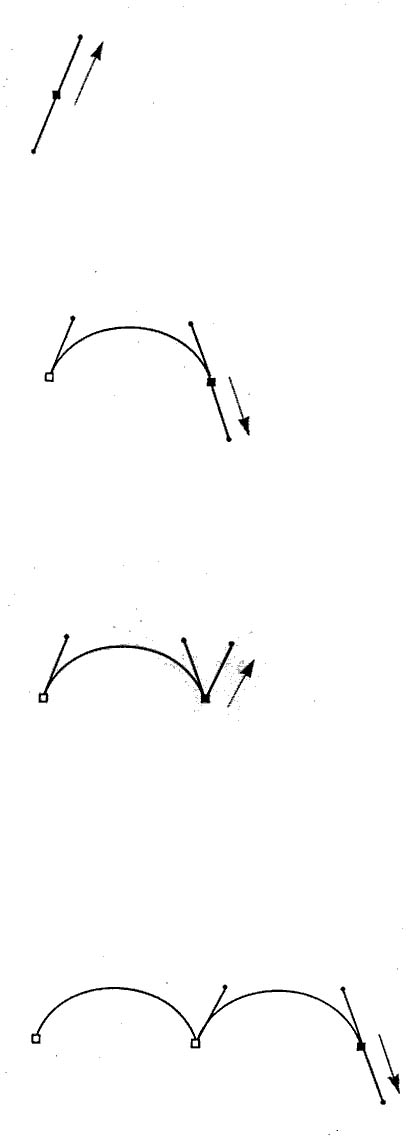 |
Creating non-continuous
curves (convert-direction-point tool method):
|
Creating
non-continuous curves (convert-direction-point tool method):
|
 |
Hold down Alt + Control (Option+Control/Mac)
to use the convert-direction-point tool to move a direction line when the Pen
tool is selected.
To convert a pair of direction lines back to a smooth curve, choose the Direct Selection tool, click on the anchor point, choose the Convert-direction-point tool, then click on the direction line point.
Continue to the RESHAPE PATHS handout